Showing posts with label food. Show all posts

Friday, July 22, 2011

Good Ol' American Apple Pie

Slice of Apple Pie!
Ok... I usually (and by usually I mean ~80-90% of the time) eat vegan. When I don't eat vegan, I'm particular about where my meat and dairy come from. My man wanted me to make him an apple pie for Memorial Day weekend (yes... I'm finally getting around to publishing the post now - chaos!). Anyway, I decided to use up some lard (yep... lard) that I had in the pantry wrapped up for eons to make the crust. I wish I could deny, but its the best damn crust I've ever had. Along w/ the crust, I came across a recommendation to utilize more than one type of apple in the pie. I always thought it was a "must" to use Granny Smith only in the pie filling. Not to knock Granny... she is wonderful; however, I have come to find that adding a different type of apple is just what the filling needed to stand out.

On to the important part:
Good Ol' American Apple Pie

The Ingredients:

Crust (makes enough for base and covering of filling):
2 C White All Purpose Flour
1 tsp NaCl
3 tbsp Sugar
6 tbsp Butter (cut into small chunks)
6 tbsp Lard (cut into small chunks)
6 tbsp Ice Cold Water

Pie Filling:
2 Granny Smith
2 Red Delicious
2 Pink Lady
3/4 C Sugar
2 tbsp Flour
1 tsp Cinnamon
1/4 tsp NaCl
1 tbsp Cider Vinegar

What To Do:

Preheat oven to 400 degrees F.

Crust:
When you cut up the butter and lard in the chunks, it helps to chill them first in the freezer.  Use your own judgment here.  It can't hurt if its in for a bit.  I'd say give it ~ 10-15 minutes in there if was at room T to begin with.
Mix all of the dry ingredients together in a bowl.
Using your hands, mix in the chunks of butter and lard.  Break up the bits of butter and lard into even smaller chunks and keep incorporating into the dry ingredients until well mixed into a crumbly mass (you decide how crumbly).
Place in freezer about ~ 10 minutes. 
Take out of freezer and make a well in the center of the crumbly mass and add the 6 tbsp water.  With the back end of a fork, work from the outside in to mix your crumbly mass with your water.  Only do this enough to form a dough ball.  DON'T OVERMIX or you won't have the flakiness.  Cut the dough in 1/2, roll in balls, place in plastic wrap, and put back in the freezer while you make your filling.

Filling:
Place a bowl of cold water w/ a couple of tbsp of lemon juice close by.
Peel and slice the apples.  Add the apples to the lemon/water so they don't oxidize and turn brown (this isn't critical).
Drain the lemon/water from the apples when finished cutting and peeling them all.
Add the rest of the filling ingredients together with the apples and mix well.  Set aside.
Butter the bottom and sides of a pie pan (I used a glass one).
Take one of your dough balls out of the freezer and roll out to form your bottom pie crust.  I left hunks of butter and lard.  I did not get all of my pieces "pea size" as is usually recommended - up to you.  Place rolled dough in your pie pan, poke some holes in the bottom w/ a fork, cut extra dough off, crimp sides or press down with a fork, and fill with your apple filling.
Place in freezer for ~ 5 minutes.
Remove other dough ball from freezer, roll out as above, and place on the pie.  Cut excess dough off and crimp/press edges to seal.  Cut or poke some holes/lines in the top of your crust.
Place pie in the freezer for ~ 5 minutes.
Brush top of the dough w/ some butter and sprinkle w/ cinnamon and sugar if you prefer.
Bake for 1 hour at 400 degrees.
Let pie sit for about 1/2 an hour before you cut and serve.  If not, you will have filling juice running rampant.  This pie is better warm or refrigerator cold.  Piping hot doesn't allow the juices to set.

Finally - after all of that - dig in!

The whole pie w/ its mountainous crust!
My Thoughts:

Goals for the future regarding the crust:
1) Must get organic and/or local farm lard (I used the last of the pantry stuff I had and it probably came from a massive feedlot pig - not where I want my critters to come from).
2) Ditto on the butter.
3) Try to veganize the crust and see if it even comes close.

As stated above, try different apple types. Ensure that you have at least one "cooking/tart" apple like Granny, but feel free to put in one or two other "mushy" ones. They won't bake up mushy, but they give a softer texture and sweeter taste.

For years I always made the pie crust in one shot on the counter and then put the filling in and baked immediately. I decided to go through the freezing stages indicated above and I really believe that this (along w/ the lard addition) is what gave this pie crust the wonderful texture and flake that it had. The taste would have been there no matter what, but that freezing process really helped.

Saturday, May 28, 2011

Wheat Pita Bread

Wheat Pita Bread - Yum!

Homemade pita bread is pretty simple... and there are so many ingredient variations to this that work well.  You can eat it plain, make it into a mini pizza, cut it and stuff it or just wrap your goodies up in it.  This is an easy recipe to make/tweak and doesn't go "clunk" in your gut when you eat it.  I'll list what ingredients I used for this one and list some other variations that have worked well too!

The Ingredients:
1 packet highly active rapid rise yeast
1 1/4 warm water
1 1/2 C white flour
1 1/2 C wheat flour
1/4 C olive oil
1 tsp salt
~1/4 C extra white flour for dusting

What To Do:
In a mixer bowl hand whisk (just until mixed) the yeast and 1/2 C of the water.  Then whisk (or stir w/ a wooden spoon) 1/4 C of white flour and 1/4 C of wheat flour (just until mixed).  Cover bowl w/ plastic wrap and let rise for 30 minutes.

Remove plastic wrap from bowl, attach dough hook to mixer and add the remaining 3/4 C warm water, 1 1/4 C white flour, 1 1/4 C wheat flour, olive oil, and salt.  Knead on the lowest setting for 8 minutes.  The dough will be smooth and elastic - very elastic.  It will almost seem too wet but trust me... the flour amounts are dead on in this recipe.  Place dough in oiled bowl, turning once to coat, cover w/ plastic wrap and let sit for 1 hour.

After 1 hour, place oven rack in middle of oven and preheat between 425-450F.  Place a pizza stone in the oven to heat up as the oven preheats.  Transfer the dough to a lightly floured surface (here is where your extra 1/4 C will come in - you may use more or less depending).  Punch the dough down a few times and divide into ~ 8 balls.  Flatten and stretch the balls out into a 6-7 inch disc by hand.  Flour will be used each time from your extra 1/4 C but don't go overkill.  Transfer the discs to oil coated baking sheets to sit for 20-30 minutes.

Place 4 pitas (or however many will fit) on your pizza stone that has been heating in the oven.  Bake 2 minutes on one side, then flip and bake 1 minute more on the other side.  Transfer to cooling rack and let cool completely.  Repeat w/ remaining pitas until all are cooked.

My Thoughts:
This turned out to be a light and fluffy pita - love it!  After letting the pitas cool, my favorite way to prepare these is to crank up the broiler and put some pizza sauce, feta, or any other topping you want and broil it for a few minutes until the cheese is melted and the pita gets a crisp brown top (but maintains it's soft center).  Then I sprinkle Italian seasoning, garlic salt, or any other spice I'm in the mood for and it makes one awesome mini pizza.

Other variations I enjoy are just dipping the pita in olive oil as an appetizer or throwing some greens and dressing on it and folding it up like a gyro would be.  Never tried the gyro part and now that I think of it, that would probably be pretty good.  Rye makes a super good swap out for the wheat if you want to and I especially like adding caraway seeds to it when using rye flour.  I'm thinking of trying an oil switch (maybe walnut oil).  I'd also like to mix in some seasonings w/ the actual dough instead of putting them on top (rosemary or coriander would be nice).

Also, when handling the dough after it has mixed for 8 minutes, it helped to coat my hands in olive oil, so that I could get  the dough transferred over to the bowl.

This is a recipe that I just started to use and know that I will be utilizing even more in the future.  My issue is not eating all of the pitas in one day ;-)

Adapted from pure & yummy

Sunday, April 17, 2011

Hot Campanelle Salad with Garlic, Pistachios, Cranberries, and Herbs

Hot Campanelle Salad
I'm in the mood for pasta - in the form of a "salad" but still hot (although on a blazing day after a hike in the sticks I would totally go for this already prepared and chilled - I cannot deny).  But right now... I'm feeling this as a hot dish vegan style.

The Ingredients:
  • 2 oz (one serving) Campanelle Pasta
  • 1 small Garlic Clove
  • 15 Pistachio Nuts
  • 1 oz Dried Cranberries
  • 1 Tbsp Italian Vinaigrette
  • dashes of the following to taste: Thyme, Mint, Salt, and Pepper
What to do:
  1. Cook pasta al dente for roughly 10 minutes in boiling water.
  2. While pasta is cooking, rough chop garlic, remove pistachio shells, and mix garlic, pistachios, and cranberries in bowl.
  3. When pasta is done, drain water, add vinaigrette to pasta, and stir to coat.
  4. Add bowl of garlic, pistachios, and cranberries to pasta and mix.
  5. Season your salad to taste w/ thyme, mint, salt, and pepper.
  6. Pig out while still hot.
The Ingredients

Cooked/Drained Campanelles
My thoughts:

A lot of changes can be made here: from different pasta shapes, to different nuts, to different herbs... make this salad your own and it doesn't have to be vegan (different hard cheeses would be good w/ this).  Beware when you measure out your serving of campanelle.  Two ounces dry is one serving and it looks like there is barely anything in the bowl; however, when the pasta cooks up (and it may take a while to cook if you want it more tender than al dente) it's volume will increase.  I went a bit heavy on the garlic - in fact, I will probably go w/ 1/2 a clove next time; however, rock out w/ a whole clove if you REALLY love garlic.  This is excellent hot - I love the vinaigrette on this at a higher temperature...yum!  I think it would be great cold as well - I'm thinking of pre-making this in the future, chilling, and packing in a cooler to go w/ me for an after hike boost ;-)  Enjoy!
 

Sunday, April 10, 2011

Vegan Date Balls (inspired by LARABAR)

Date Balls - my version of dessert!
I love the simple ingredients in a LARABAR and wanted to make my own for hiking trips (and just to eat around the house when I'm in the mood for dates).  LARABAR has a boatload of different flavors.  My adaptation is somewhere between a key lime pie and a cinnamon roll if I had to choose.  I tend to roll these up in balls rather than bars when not hiking so I have a smaller portion.

The Ingredients
The Ingredients:
  • 2 dried Figs
  • 4 Medjool Dates
  • 1/2 oz Raisins
  • 1/2 oz Cashews (I used raw)
  • 1/2 tsp ground Cinnamon
  • 2 tsp Lime Juice
Ready to Pulse to get to.....

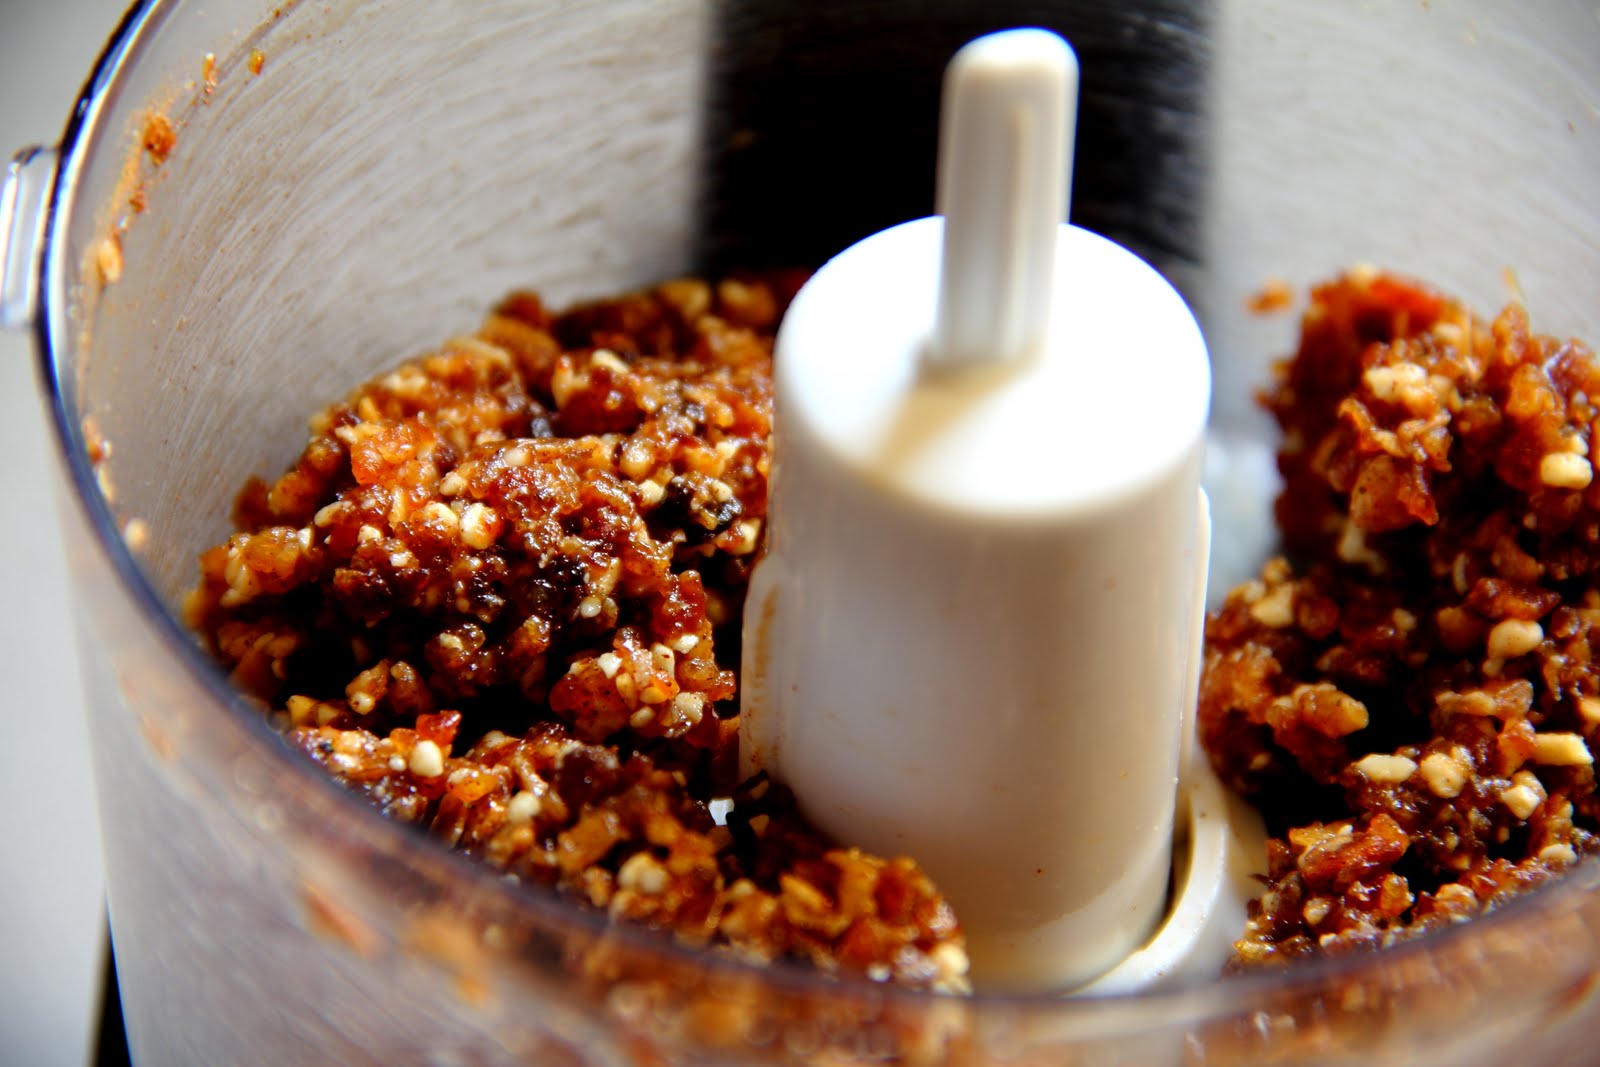
The combined/processed ingredients
    What to do:
    1. Roughly cut up your dried figs in halves or quarters, pit your dates (which will leave you w/ halves) and throw in a food processor.
    2. Dump your raisins and cashews into the processor.
    3. Pulse on high until chopped into a course mass (will be somewhat dry).
    4. Add the ground cinnamon and pulse until mixed.
    5. Add the lime juice and pulse until a course sticky mass begins to form (will be much wetter w/ the addition of juice).
    6. Roll into ~ 5 small balls or form 2 bigger rectangular bars.
    7. Keep refrigerated until ready to eat.
    The Date Balls in all of their glory!
      My thoughts:
      As stated above, you can do a multitude of things w/ these - mix it up!  You can add honey, stevia, or agave as a binder or switch out lime juice for lemon.  Depending on your date moisture, you may need much less lime juice (or no binder at all), as fresher dates have a higher moisture content.  I do not soak my dates before processing.  I like lime juice and these balls are a bit tart.  I would suggest adding only 1 tsp - taste - then add more to your liking if necessary.  I have even used chocolate and cayenne in these babies!  For hiking, I make bars out of these... easier to deal w/... and I wrap them in wax paper or parchment so they aren't sticking to everything.  Even though I refrigerate to keep them fresh... I've hiked for hours before eating one- its no biggie (although a little more gooey ;-)

      Check out LARABAR (the inspiration for the recipe) at:

      http://www.larabar.com/

      Saturday, April 9, 2011

      Simple Vegan Salad

      Quick and Simple Vegan Salad
       I am not vegan 100% of the time (its more like 75%).  Years ago I would have laughed at the suggestion of such as thing; however, due in enormous part to my best friend who is 100% vegan, I gave it a shot.  The amazing thing is... I love it and have found many unique food combinations that make vegan cooking and meal preparing easy.  This salad is quick, simple, delicious, and healthy.  The ingredient list is small and there are minimal tools involved.

      The ingredients:
      • 2C chopped Red Leaf Lettuce
      • 2C chopped Green Leaf Lettuce
      • 3C chopped Kale
      • 1/2 to 1 oz Walnuts (chopped or halved)
      • 1/4 oz chopped Dried Mushrooms (I used chanterelle)
      • 1/2 oz Raisins
      • 1 chopped Medjool Date
      • 1 Tbsp Italian Vinaigrette (or dressing of your choice)
      The ingredients
      What to do:
      It doesn't get much easier than chopping your ingredients and mixing them together ;-)

      My thoughts:
      I love raw kale.  Many do not, as it has a strong bitterness to it.  You may prefer to just use red, green, romaine, spinach, etc. w/out the kale, but I love it.  Kale is also "crunchier" than other greens, which gives the salad a bit more texture.  I think pecans or pine nuts would make a nice addition to this (or a replacement for the walnuts)... even cashews would be nice.  The grocery store where I shop tends to only have the "specialty" mushrooms dried.  There are instructions stating how to reconstitute the mushrooms w/ water or wine (I bet they'd be good w/ wine); however, I was in a hurry and just put them on dried and I freakin' love 'em that way!  A small amount gives just enough crunch and earthiness to the salad.  Raisins can be swapped out w/ cranberries or apricots - any other dried or fresh fruit would be good (now I'm thinking blueberries!).  The medjool (to me) is the best substitute in the world for sugar... and I love sugar.  One medjool just gives it some chewy sweetness - nothing overkill.  Any dressing can be used; however, I use sparingly.  One tablespoon is it for me, as I want to taste all of the other flavors going on.  I pair this often w/ a glass of petite syrah - glorious!  So now that I wrote about it... I'm off to eat it!

      Wednesday, April 6, 2011

      Pitstop on Jekyll Island Georgia

      When preparing for my Florida trip to see the final launch of Space Shuttle Discovery, I was attempting to loosely plan possible places to stop along the way.  I had never been to Georgia and was looking on Google Maps to see where a unique place to visit would be.  I noticed Jekyll Island and thought it looked interesting.  Although I only stayed there for two nights, below are some tidbits from me (along w/ some pictures and helpful links) that can give you an idea of what Jekyll has to offer.  I didn't scratch the surface here w/ what you can see and do, but its a start.

      Whenever I travel blog... there will always be a section about photography, since that is the main purpose of my trips.  I like to get outside and take lots of pictures.  In researching what this island had to offer, I honed in on the northern part of the island, as it is known for it's driftwood (due to erosion).  Sunrise and sunset both offer great lighting on the driftwood in different ways and I spent the first evening and a large portion of the following morning just shooting driftwood.
      Driftwood on Jekyll Island Georgia
      Of course, an obvious thing to do is just stroll and sleep on the beach, which I spent plenty of time doing.  I found several areas tucked back in among driftwood and Spanish moss covered trees where I was all alone - it was great!

      The island has quite a bit of unique history.  In the late 1800's, Jekyll was owned by the Rockefellers of the world and was exclusively open to millionaires as a playground.  Although this is an important part of the island's history, and there is plenty to see on the island reflective of this time period, I focused on a different part of the island that dated back to the 1700's.  I am fascinated by old ruins or abandoned buildings/houses and wanted to visit the Horton House.  This house was constructed in 1743 and is one of Georgia's oldest buildings.  The construction of the house is interesting in it's composition.  It consists of oyster shells mixed w/ sand, lime and water into a mortar called tabby.  More can be found on the history of the Horton House, the Jekyll Island Club, and the Historic District (along w/ additional events that took place on the island) at the link below:

      http://www.jekyllisland.com/

      The above link also has loads of other information on the island such as where to stay, where to eat, things to do, etc.  Its a great site for getting a feel for Jekyll and finding out what you want to do.  It also has an awesome map of the island that shows where everything is located (under Getting to Jekyll/Directions/.pdf map). 

      Horton House Remains Jekyll Island Georgia
      When it comes to food, I try to be as frugal as possible when traveling.  I try to pack my own food and minimize stopping to eat at restaurants; however, I thought it would be good to try one of the local places on the island (there are many and I have learned that I need to get into this habit more often when I travel - you can still be frugal if you try).  A couple I met had recommended SeaJay's.  I loved the drive to the restaurant, as it was tucked in back a dirt road by the marina.  An awesome welcome was the smell when I walked up to it... seafood seasoning!  I couldn't wait!  I sat outside and read my Kindle while waiting for my food.  The atmosphere was laid back, comfortable, and casual.  I ordered the crab cake sandwich w/ slaw (yum city) along w/ the homemade key lime pie (super yum city).  It rocked and I would definitely go back (would love to try the Low Country Boil).  Check out details/menu at:

      http://seajays.com/

      There is so much more I could go on about, but I'll stop here and suggest you check out the island website and take it from there.

      Some additional tidbits to know:
      1) There is a $5.00 "use fee/pass" that you will need to pay when you drive over the causeway to the island.  Small price for all that you can do.
      2) As of February 2011, there is some construction (buildings and roads) going on - be on the lookout for road closures and detours.
      3) Several hotels and cottages are available to stay at on the island.  I can only speak for the hotels and say that they don't detract from the island's charm too much.  They do have an island feel to them which is nice.
      4) There are year round residents who live on Jekyll.  Please respect their property and privacy.

      I'm glad I stopped on Jekyll Island.  I wanna make a return trip just to try more places to eat ;-)

      Saturday, April 2, 2011

      Moab Rocks (literally and figuratively)

      It didn't take much thinking to figure out what I wanted my first post to be about on my new blog.  I love Moab Utah.  My man has been going out to Salt Lake on a ski trip with friends for several years and invited me to go along three years ago.  I don't downhill ski; however, I travel alone more often than not and figured that I would just wander off on my own someplace while everyone skied.  So I researched areas which I thought would be good for picture taking, as I am an amateur photographer and typically plan my vacations around where/what to photograph.  I decided I would rent my own car and head down to Moab.  It turns out my love wanted to go with me too.  Ever since that first year I went, he skis at the beginning and end of the trip and goes to Moab with me in the middle.  I wanted to showcase some Moab pictures in this post and share with you some fun things we have enjoyed doing while in Moab and the surrounding areas.  

      1) Hiking in Moab: There are so many trails to hike at different skill levels with so many different views.  You can hike long/flat miles or short/steep ones (like the Portal trail).  We have always visited Moab in March, so we have hiked in snow storms one day and short sleeves the next.  

      Hiking up Portal Trail facing the La Sal Mountains


      2) Jeepin' in Moab:  I never imagined having so much fun taking jeep trails in the high desert, but the first year we went to Moab this was a "must do" on my man's list.  It really is the highlight of our trip there.  Normally I would say hiking or photography is my favorite part of a trip; however, its nice to be able to cover more territory in a jeep considering the limited time we are there.  Plus... when we go... no one is around (and I mean no one).  You get out there and its dead silent.  We take a picnic lunch and just go.  

      Check out this site for more details:

      Jeepin' off White Rim Road at the Intersection of Lathrop Canyon Road
      3) Photographing in Moab:  Ok I've covered that a bit in the last two since I included some photos, but I can't say enough how many unique opportunities there are for pictures.  You have mountains with greenery and snow, red rock high desert, arches, canyons, critters... on and on it goes.  Even when the weather doesn't give you blue sky and sunshine, cool things can be captured with your camera.
      Colorado River Overlook on White Rim Road
      Storm over La Sal Mountains

      4) Star Gazing in Moab: Although I currently don't have anything pictorially to show for it, I have to say from previous experience that stargazing out here is amazing.  I live in a somewhat rural area in PA and frequently look up at Orion and never realized (until looking at him out there) how many little stars you can actually see and how the spirals of the Milky Way really stand out.  My next adventure out there will be to jeep or hike out to an area where no one else is located and camp out under those stars.

      5) Eatin' and Drinkin' in Moab: So many places to eat/drink... its unreal!  Each time we go, we have favorites we go back to and new ones we try.  From the authentic shredded beef tacos at Fiesta Mexicana to the home brews at The Moab Brewery and the live music at Eddie McStiffs, there is something for everyone.  

      Check out these sites for more details:
      http://www.themoabbrewery.com/

      Pictures below were taken by my man (JCM)


       There are many more things about Moab that can be mentioned here (mountain biking, art, National Parks).  I'll have a Part II to this post at another date to cover some other great things about Moab.